RIGHTBRAIN BLOG
How to create a task on Rightbrain
How to create a task on Rightbrain
A quick guide on how to create a task in the Rightbrain app
(If you'd prefer to read this guide on notion, then click here.)
Tasks are the core components of the Rightbrain platform. They are automated processes that execute predefined instructions every time a large language model receives new input data. Each task includes:
Instructions: What the model should do, defined through the user and system prompts.
Dynamic Input Variables: Placeholders (e.g.,
{customer_review}) that specify which part of the input to process. Referenced in the user prompt.Structured Outputs: Predefined output formats to ensure consistency across runs.
Step 1 - Name your task
To begin creating a task, click on the ‘Create Task’ button in the dashboard. Following this, you can give your task a name.
Step 2 - Set your prompts
First, you’ll have to compose your task in the user prompt. For the purpose of our demo we’ll focus on a sentiment analysis task for a product review. We will enter the follow task in the user prompt field.
User prompt: ‘Please conduct a comprehensive sentiment analysis on the {customer_review} and describe the product image (if one is included). Verify that the image matches the product described in the review. ‘
Here, {customer_review} is a dynamic variable that the model replaces with actual data at runtime. The instruction also tells the model to analyse any provided image. You can choose to feed text data in string or a url as the task input.
You can also add a system prompt to provide additional context or constraints.
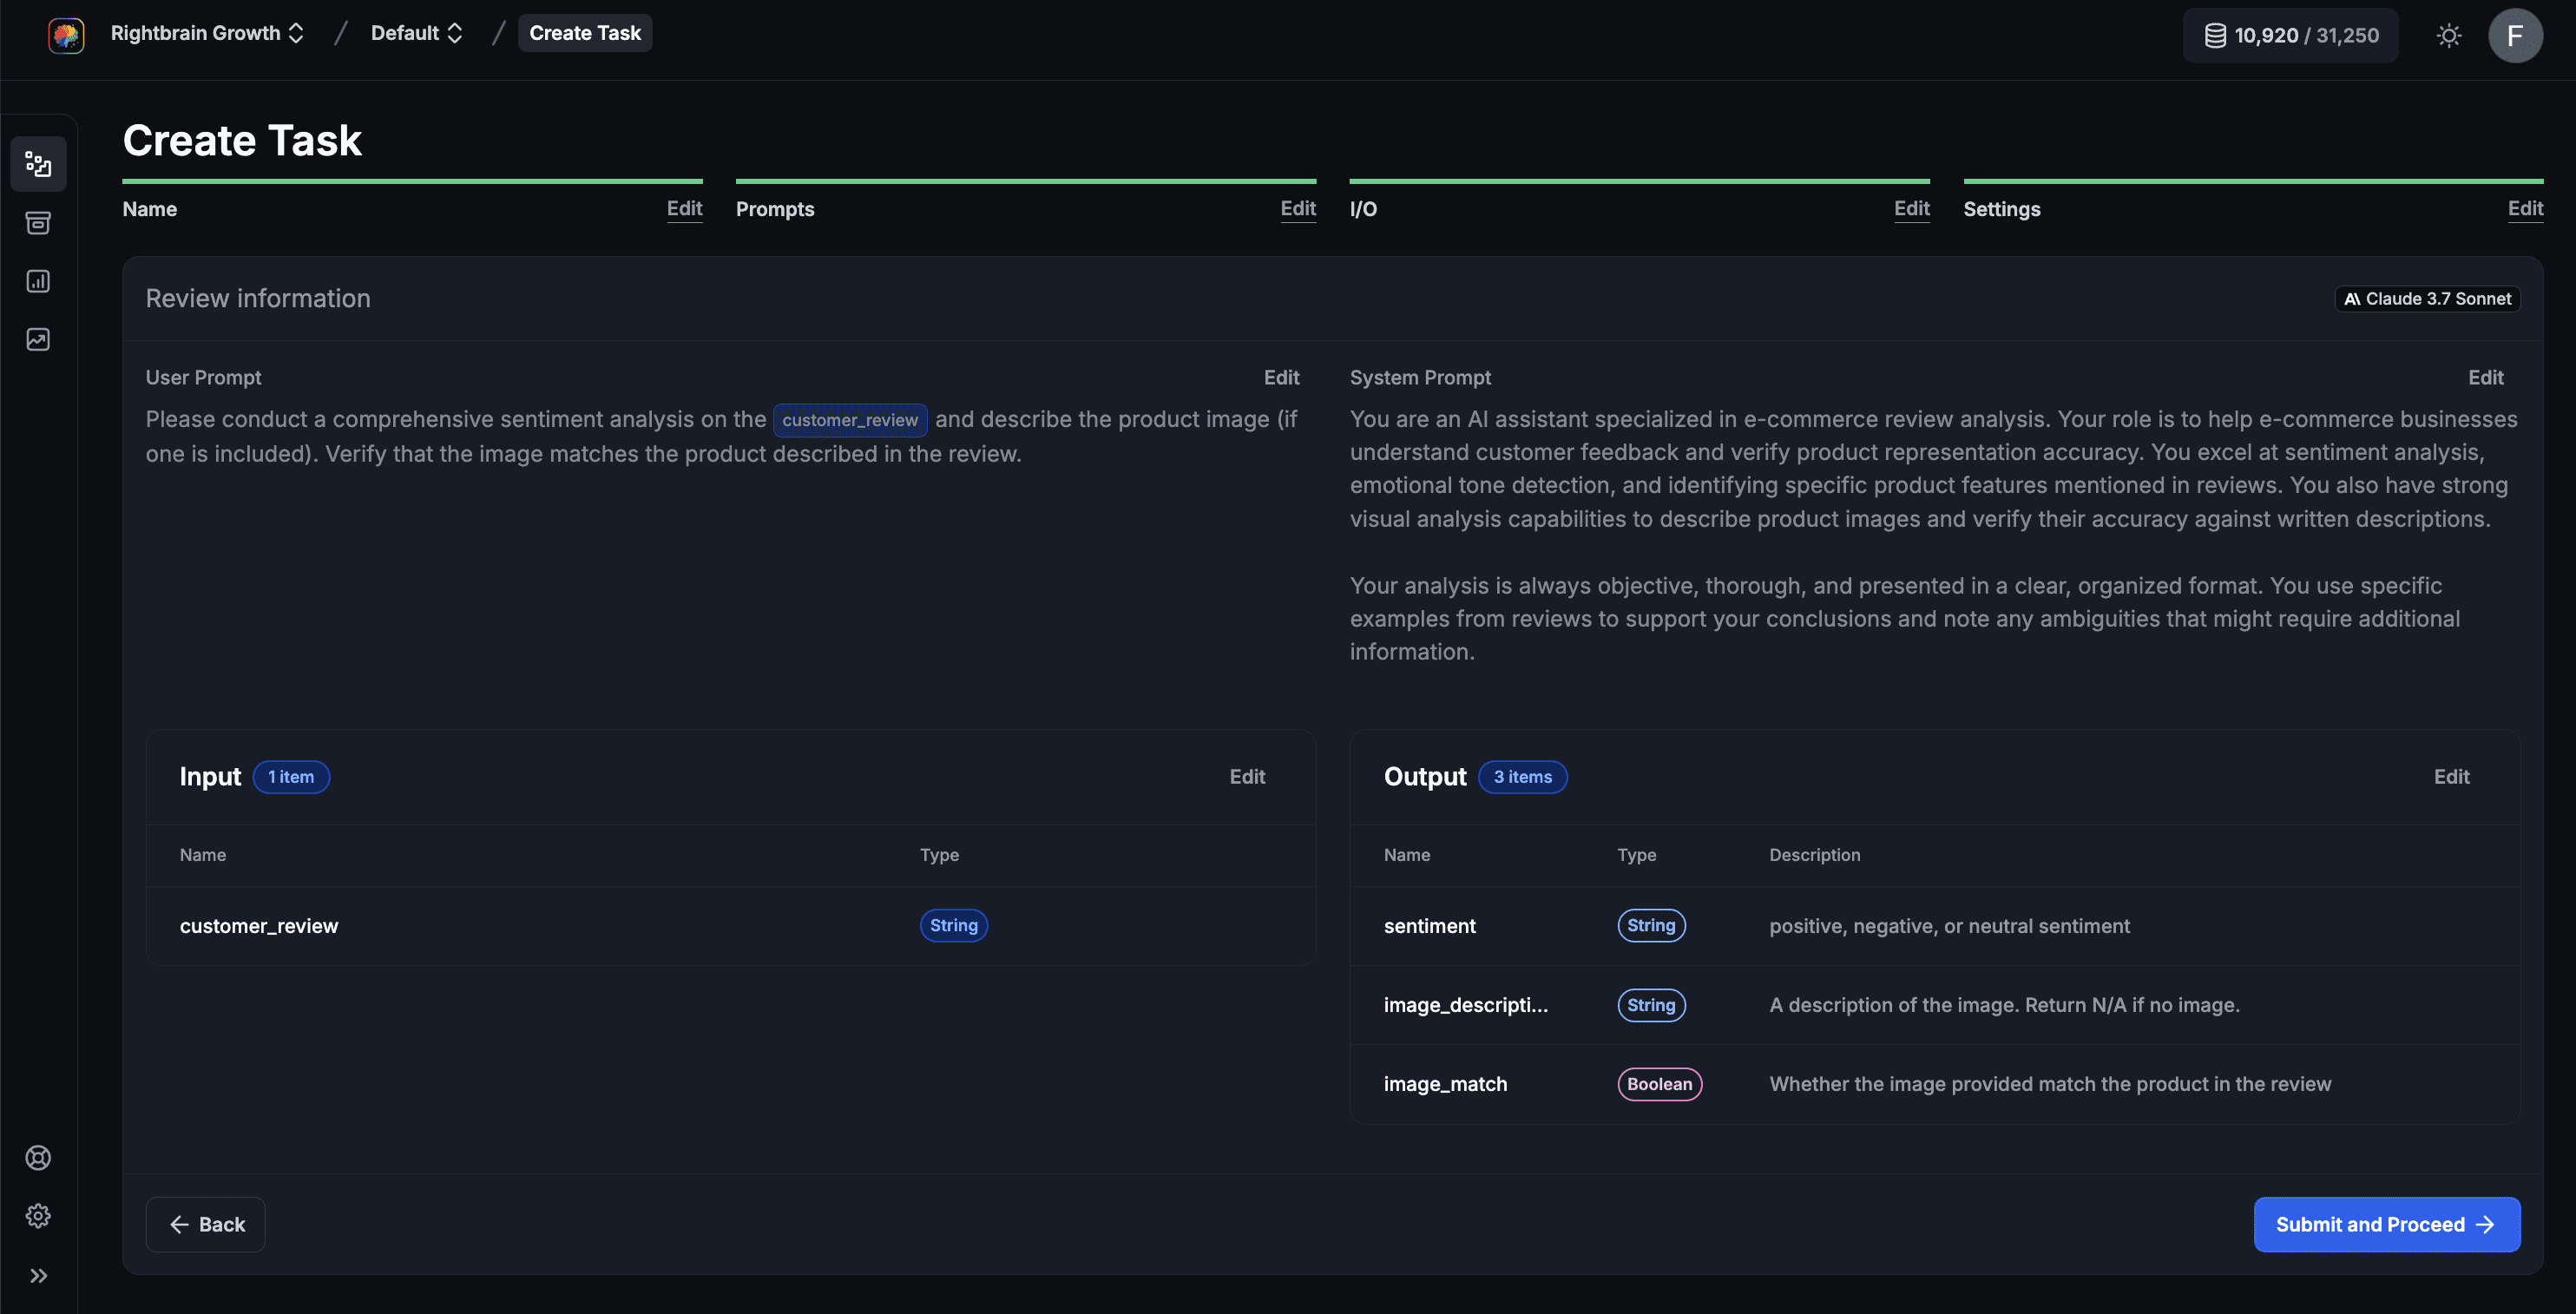
Step 3 - Finalise Inputs and Specify Outputs
This is another opportunity to define any input variables, which can be either text or dynamic inputs, like URLs.
If you are happy with your input parameters, then you can set up the outputs you expect from the task by naming them, choosing their data types, and providing a description. This step ensures that every task run returns data in a consistent format for use in your database or app UI.
Go ahead and enter the following outputs for our test:
Output name | Type | Description |
|---|---|---|
sentiment | String | Whether the review is positive, negative or neutral |
image_description | String | A description of the image. Return N/A if no image. |
image_match | Boolean | Whether the image provided match the product in the review |
Step 4 - Choose a model and configure additional settings
Having drafted your task, you have several models to choose from. You can select from powerful advanced reasoning models for complex tasks through to cost-efficient, speedier models for simpler jobs. For this task, you’ll want to choose one with vision capabilities, like Claude Sonnet 3.7 🖼️.
We’ll make sure to specify that the task expects a file if an image is being passed through for the task.
You can also set the temperature and add a webhook to automatically forward task outputs to a specific destination.
When you’re ready, just hit Submit and Proceed to review your task configuration. Just like that, you’ve created your first task on Rightbrain. Now we’re ready to save our task and test it to see if it works.
(If you'd prefer to read this guide on notion, then click here.)
Tasks are the core components of the Rightbrain platform. They are automated processes that execute predefined instructions every time a large language model receives new input data. Each task includes:
Instructions: What the model should do, defined through the user and system prompts.
Dynamic Input Variables: Placeholders (e.g.,
{customer_review}) that specify which part of the input to process. Referenced in the user prompt.Structured Outputs: Predefined output formats to ensure consistency across runs.
Step 1 - Name your task
To begin creating a task, click on the ‘Create Task’ button in the dashboard. Following this, you can give your task a name.
Step 2 - Set your prompts
First, you’ll have to compose your task in the user prompt. For the purpose of our demo we’ll focus on a sentiment analysis task for a product review. We will enter the follow task in the user prompt field.
User prompt: ‘Please conduct a comprehensive sentiment analysis on the {customer_review} and describe the product image (if one is included). Verify that the image matches the product described in the review. ‘
Here, {customer_review} is a dynamic variable that the model replaces with actual data at runtime. The instruction also tells the model to analyse any provided image. You can choose to feed text data in string or a url as the task input.
You can also add a system prompt to provide additional context or constraints.
Step 3 - Finalise Inputs and Specify Outputs
This is another opportunity to define any input variables, which can be either text or dynamic inputs, like URLs.
If you are happy with your input parameters, then you can set up the outputs you expect from the task by naming them, choosing their data types, and providing a description. This step ensures that every task run returns data in a consistent format for use in your database or app UI.
Go ahead and enter the following outputs for our test:
Output name | Type | Description |
|---|---|---|
sentiment | String | Whether the review is positive, negative or neutral |
image_description | String | A description of the image. Return N/A if no image. |
image_match | Boolean | Whether the image provided match the product in the review |
Step 4 - Choose a model and configure additional settings
Having drafted your task, you have several models to choose from. You can select from powerful advanced reasoning models for complex tasks through to cost-efficient, speedier models for simpler jobs. For this task, you’ll want to choose one with vision capabilities, like Claude Sonnet 3.7 🖼️.
We’ll make sure to specify that the task expects a file if an image is being passed through for the task.
You can also set the temperature and add a webhook to automatically forward task outputs to a specific destination.
When you’re ready, just hit Submit and Proceed to review your task configuration. Just like that, you’ve created your first task on Rightbrain. Now we’re ready to save our task and test it to see if it works.

RELATED CONTENT
Our latest blogs and articles

Join our developer slack
Request to join our developer slack channel
Join us on

Join our developer slack
Request to join our developer slack channel
Join us on
Join our developer slack
Request to join our developer slack channel
Join us on
Join our developer slack
Request to join our developer slack channel
Join us on
Join our developer slack
Request to join our developer slack channel
Join us on
Join our developer slack
Request to join our developer slack channel
Join us on